ERP User Manual
Product
The Product List page displays a complete table of all products currently stored in the system’s database. This table provides users with a quick overview and access to manage product-related information.
 Figure 1: Product List View
Key Columns:
- Name – Product name displayed in the system.
- Code – Unique product identifier.
- Category – Category assigned to the product.
- Cost / Price – Purchase cost and selling price of the product.
- Stock – Quantity available in the system.
- Status – Indicates if the product is active or inactive.
- Actions – Includes View, Edit, Duplicate, and Delete options.
Add Product
To add a new product into the system, users can click the Add Product button,
 located on the Product
Index page. This will open a form where product details must be filled in.
located on the Product
Index page. This will open a form where product details must be filled in.
 Figure 13a: Add Product Form (I)
 Figure 13b: Add Product Form (II)
 Figure 13c: Add Product Form (III)
Form Fields:
- Name – Product name.
- Code – System-generated or manual entry code.
- Category – Select from predefined product categories.
- Unit – Measurement unit (e.g., piece, kg, box).
- Cost / Price – Input purchase cost and selling price.
- Tax – Define applicable tax rate.
- Alert Quantity – Minimum stock quantity to trigger restock alerts.
- Image Upload – Optional image for product representation.
Once the form is completed, click the Submit button to save the product.
Category
The Category section in the Product module is used to organize products into logical groups. This helps in better product classification, improves navigation across the system, and enables easier filtering and reporting during sales, purchase, and stock operations.
 Figure 14: Product Category List
 On the Category List page, users will see a DataTable listing all existing product categories. Each row displays:
- Category Name – The name of the category.
- Code – A unique code to identify the category.
- Number of Products – Indicates how many products are assigned to this category.
- Action – Options to Edit or Delete the category.
To add a new category, click the Add Category  button at the top of the page.
class="mt-3"> Clicking this button opens the Add Category popup form, where the user
can enter:
button at the top of the page.
class="mt-3"> Clicking this button opens the Add Category popup form, where the user
can enter:
- Category Name
- Parent Category
- Image
 Figure 15: Add Category Form
 Once completed, clicking the Submit button will save the new category and display it in the list.
Print Barcode
The Print Barcode feature allows users to generate and print barcodes for selected products. This functionality is crucial for efficient inventory tracking, scanning during sales and stock operations, and maintaining standardized product identification.
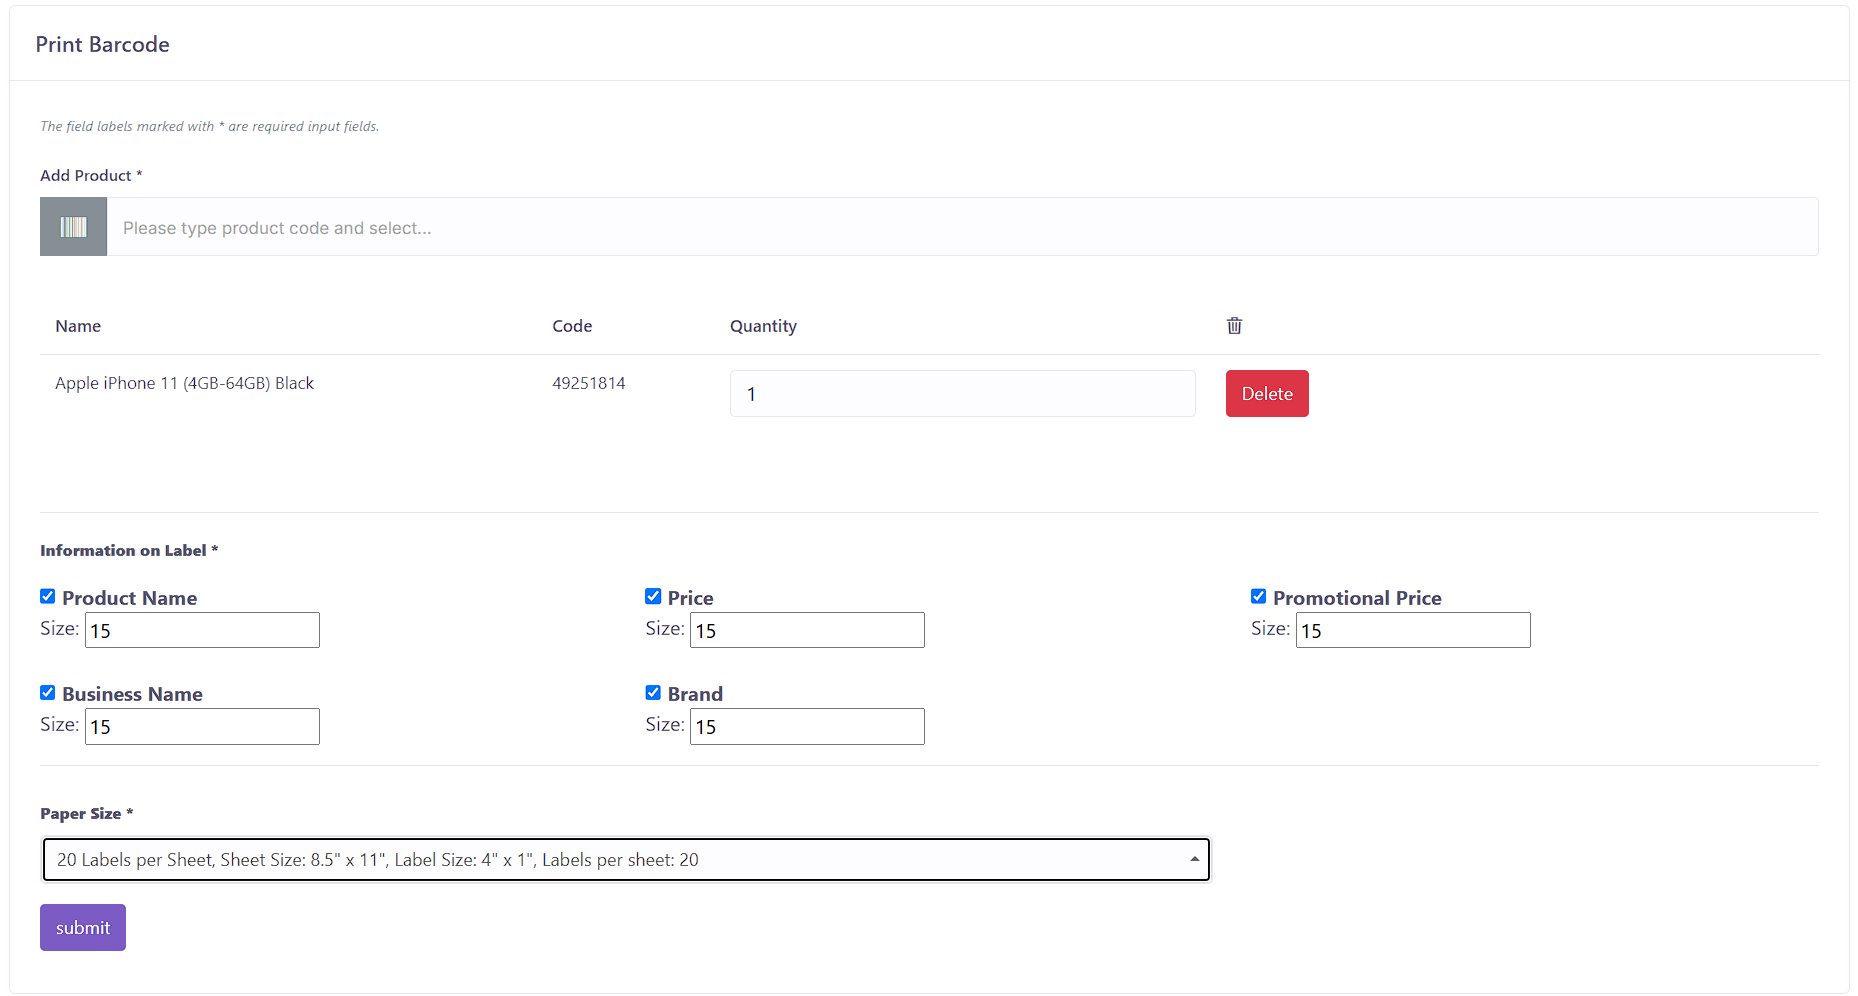 Figure 16: Print Barcode Page
 On this page, users can:
- Search and select multiple products using the search bar.
- View product details like name, code, cost, and price.
- Enter the quantity of barcodes to print for each selected product.
- Users can choose the information adn fill in the sizing of what they want to display in label such as product name, price, promotional price, business name and brand.
- Use selection dropdown to select the desired paper sizing for printing.
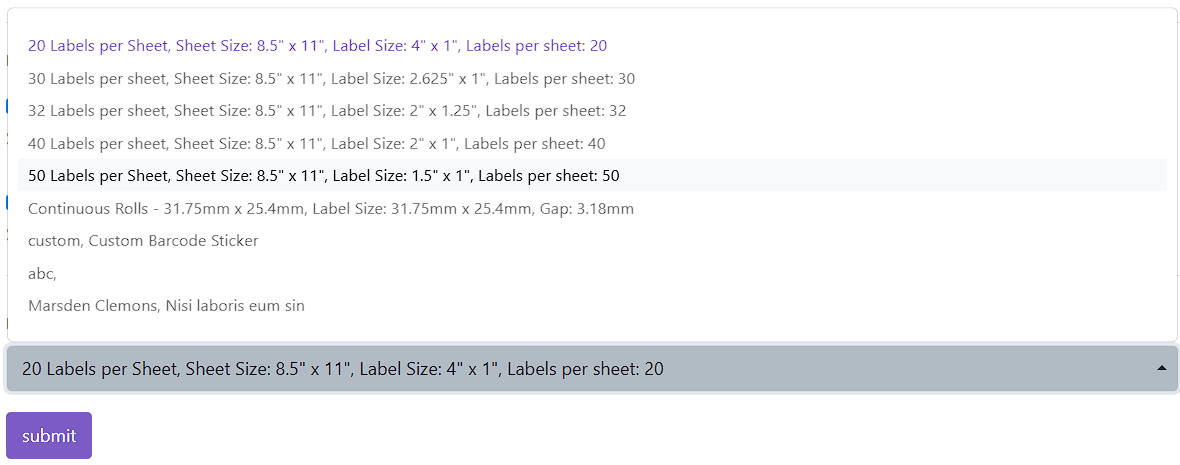 Figure 17: Paper Selection
 Once the selection is made, click the submit button  to create a preview and print the barcodes.
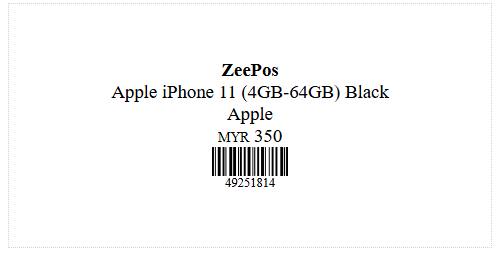 Figure 18: Generated Barcode Preview
 After reviewing the barcode preview, click Print to send the barcodes to the printer.
Adjustment List
The Adjustment List page allows users to manage stock adjustments by viewing all previously recorded quantity changes for products in the warehouse. These adjustments are critical for reflecting actual stock levels due to overstock, damage, loss, or manual corrections.
 Figure 17: Adjustment List Page
 Key Columns in the Datatable:
- Date – The date the adjustment was made.
- Reference – A unique reference number for the adjustment.
- Warehouse – The warehouse where the adjustment applies.
- Products – List of products involved in the adjustment.
- Note – Any remarks or explanation for the adjustment.
- Action – Buttons to Edit or Delete the adjustment entry.
Add Adjustment
To create a new adjustment, users can navigate to the Add Adjustment page from the sidebar or by
clicking the  button in the Adjustment List index page. This form allows users to either add or subtract product quantities in a
specified warehouse.
button in the Adjustment List index page. This form allows users to either add or subtract product quantities in a
specified warehouse.
 Figure 18: Add Adjustment Form
 Form Fields:
- Warehouse – Select the warehouse where the adjustment will apply.
- Attach Document – Optionally upload a related document (e.g., report or scan).
Product Selection and Order Table:
Users can search for products by name or code. Once a product is selected, it is added to the order table where the following details can be filled or reviewed:
- Product Name – Auto-filled from the selection.
- Code – Auto-filled product code.
- Unit Cost – Auto-filled cost of the product.
- Quantity – User-entered value representing the amount to adjust.
- Action – Choose between Addition (increase stock) or Subtraction (decrease stock).
After entering all adjustments, the user may add an optional note explaining the reason for the
adjustment. Finally, clicking the submit button will save the adjustment and apply the changes to
the selected warehouse's stock.
Stock Count
The Stock Count feature in the ERP system allows users to conduct regular inventory audits within selected warehouses. This ensures that actual physical stock levels align with the system records. The module supports both full and partial stock counts and enables users to upload initial and final files for comparison and reconciliation.
 Figure 19: Stock Count List Page
 Key Columns in the Stock Count Table:
- Date – The date the stock count entry was created.
- Reference – A unique identifier for the stock count session.
- Warehouse – The warehouse where the count is conducted.
- Category – Specific product category selected for counting (if any).
- Brand – Product brand involved in the stock count.
- Type – Indicates whether the count is Full (entire warehouse) or Partial (specific items).
- Initial File – Uploaded file with the initial stock list before counting.
- Final File – Uploaded file containing the results after physical stock checking.
- Action – Options to Finalize the stock count or view/download the Final Report.
During a stock count, the system may allow importing CSV/Excel files containing the expected stock data. Once the physical count is completed and the final file is uploaded, users can generate a discrepancy report and finalize the count. This process helps in identifying missing, excess, or misreported items and ensures accurate stock levels across the system.
When the user clicks the  button on
the Stock Count List page, a popup form will appear (see Figure 20). This form is used to initiate a new stock count
session by providing the necessary filters and setup parameters.
button on
the Stock Count List page, a popup form will appear (see Figure 20). This form is used to initiate a new stock count
session by providing the necessary filters and setup parameters.
 Figure 20: Add Stock Count Form
 Form Fields:
- Warehouse – Select the warehouse where the stock count will be conducted.
- Type – Choose between:
- Full: To count all products in the warehouse.
- Partial: To count only selected items based on category or brand.
- Category – Filter the stock count by a specific product category (optional).
- Brand – Further refine the count by selecting a specific brand (optional).
Once the form is completed, the system will generate an initial stock file which the user can download, print, or export for physical counting. After completing the count, users can upload the final file back into the system to compare expected vs. actual values and finalize the stock count.