ERP User Manual
People
The People Module provides tools to manage all user-related data in the system, including staff, customers, and user roles. It allows administrators to add, update, and categorize users based on their roles and responsibilities such as Admin, Shop Manager, HQ Staff, Accounts, POS System, or Customer. Depending on the selected role, different form views and fields are dynamically shown to ensure the correct setup and assignment of permissions, groups, warehouses, and customer details.
User List
The User List section allows administrators to manage system users, assign appropriate roles, and update user details. Users can be categorized by roles such as Admin, Shop Manager, Customer, HQ Staff, Accounts, or POS System.
 Figure X: User List
Key Columns in the User Table:
- UserName – Username for login and identification.
- Email – Email address of the user.
- Company Name – The company/branch the user is associated with.
- Phone Number – Contact number of the user.
- Role – User role (Admin, HQ Staff, Customer, Shop Manager, Accounts, POS System).
- Status – Displays whether the user is Active or Inactive.
- Action – Options to Edit or Delete the user record.
To create a new user, click the Add User button  at the top of the page. This will open a new
page
with a form to enter user details.
at the top of the page. This will open a new
page
with a form to enter user details.
 Figure X: Add User Form
The user form includes the following basic fields:
- Username – Unique identifier for system login.
- Password – Can be entered manually or generated automatically.
- Email – Email address of the user.
- Phone Number – Contact number of the user.
- Company – Company name the user belongs to.
- Role – Select from available roles: Admin, Shop Manager, HQ Staff, Accounts, POS System, Customer.
- Active – Checkbox to set the account as active or inactive.
Form View Based on Role Selection:
1. Admin & Shop Manager:
- Uses the basic form fields as listed above.
- No additional input is required.
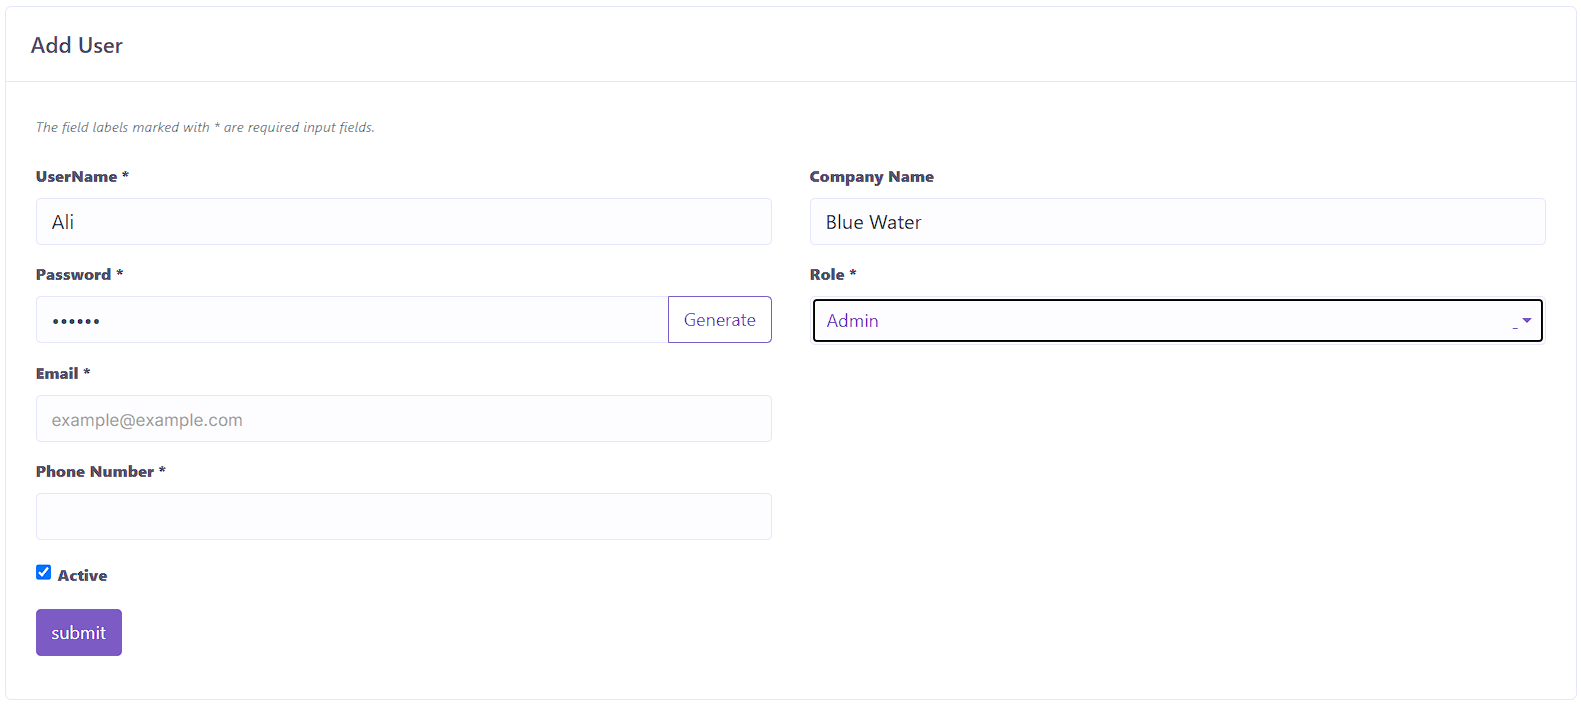 Figure X: Form for Admin / Shop Manager
2. HQ Staff, Accounts, and POS System:
- Includes all basic fields above.
- Adds Biller – Dropdown to assign the user to a billing entity.
- Adds Warehouse – Dropdown to assign the user to a warehouse location.
 Figure X: Form for HQ Staff / Accounts / POS
System
Figure X: Form for HQ Staff / Accounts / POS
System
3. Customer:
- Includes all basic fields except role-related warehouse or biller fields.
- Adds Customer Group – Dropdown to assign the user to a group.
- Name – Full name of the customer.
- Tax Number – Tax registration number (optional).
- City – Customer’s city.
- Postal Code – Customer’s postcode.
 Figure X: Form for Customer Role
Once all the fields are filled based on the selected role, click the Submit
button  to save the new
user to the system.
to save the new
user to the system.
Customer
The Customer Module allows users to manage all customer-related data including group assignment, discounts, rewards, balances, and due tracking. It also includes integration with user and supplier data when applicable.
Customer List page displays all registered customers in a tabular format.
 Figure X: Customer List
Each customer entry includes essential details such as group, contact information, discount plans, reward points and other columns:
- Customer Group – Group assigned to the customer.
- Customer Details – Name, company, email, phone, and address.
- Discount Plan – Any assigned discount schemes.
- Reward Points – Accumulated customer reward points.
- Deposited Balance – Customer's deposit amount available.
- Total Due – Unpaid amount by the customer.
- Action – Options to Edit, Due Report, Clear Due, Add Deposit, View Deposit, Delete.
To add a new customer, click the Add Customer button  located on the top left of the customer
index page.
This will open the customer form:
located on the top left of the customer
index page.
This will open the customer form:
Figure X: Add Customer Form
- Customer Group – Choose from the list of groups.
- Name – Full name of the customer.
- Company Name – (Optional) Company associated with the customer.
- Email – Customer's email address.
- Phone Number – Customer's contact number.
- Tax Number – Tax registration if applicable.
- Address, City, Country – Location details.
- IC Number – Identity card number.
- Add User – Tick to also create this customer as a user in the system.
- Both Customer & Supplier – Tick to also register this entry under supplier records.
After completing the form, click Submit to save the customer.
Some customer actions include:
1. Due Report
Displays a breakdown of dues for the selected customer.
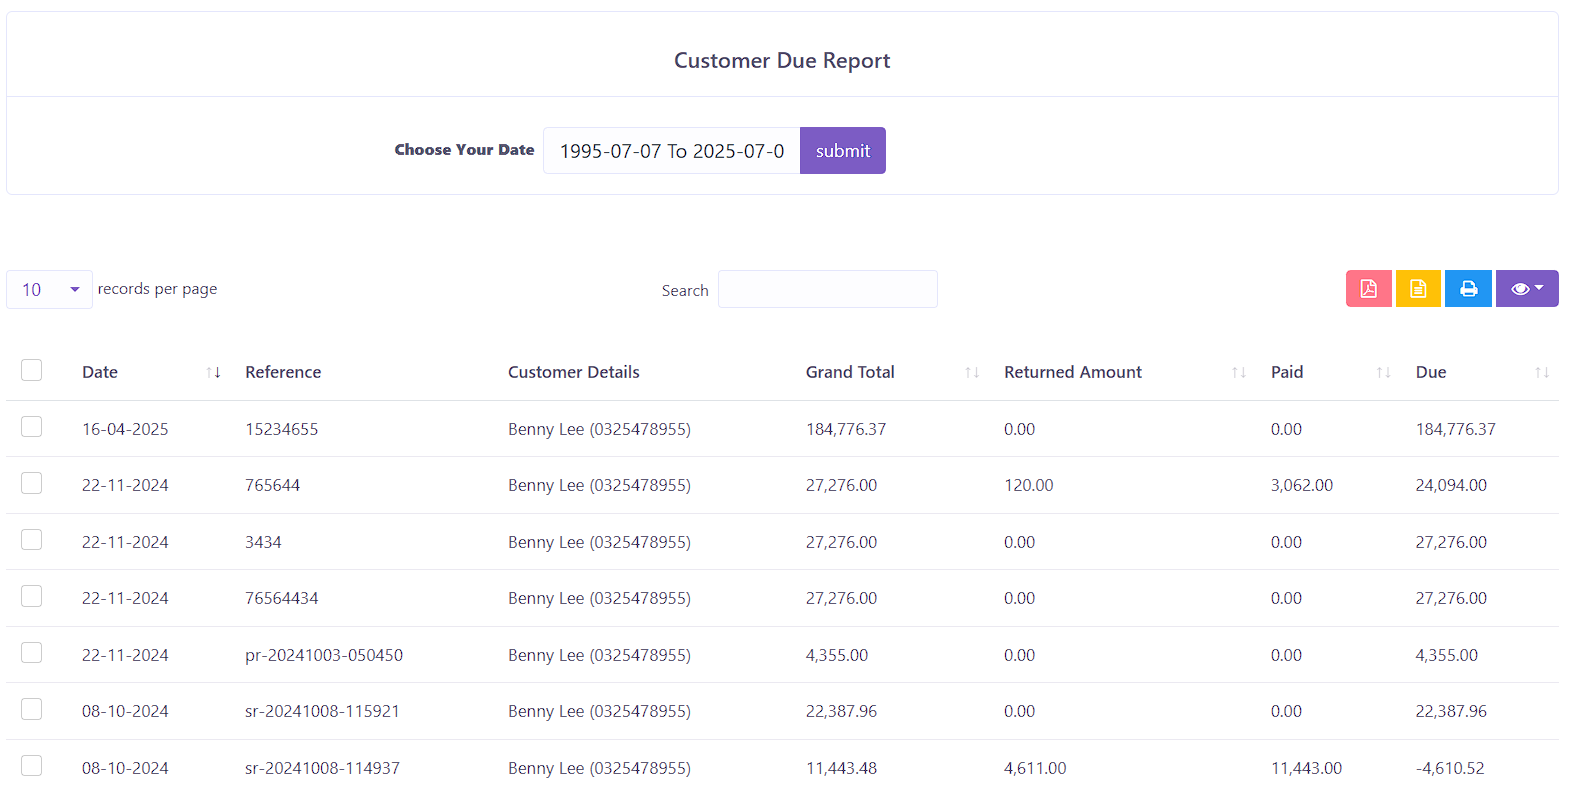 Figure X: Customer Due Report
The key columns include:
- Date
- Reference No
- Customer Details
- Grand Total
- Returned Amount
- Paid
- Due
2. Clear Due
This action opens a popup form where the user can input the amount to clear and leave a note.
 Figure X: Clear Due Popup
3. Add Deposit
Add deposit funds to the selected customer's balance.
 Figure X: Add Deposit Popup
Biller
The Biller Module manages all biller profiles in the system. A biller refers to a party (e.g., branch or sales rep) responsible for issuing invoices or receipts. This module allows users to add, view, and maintain biller details with VAT and address information.
Biller List
The index page displays all registered billers in a datatable, allowing admins to view and manage them efficiently.
 Figure X: Biller List Index Page
Key Columns:
- Image – Profile picture or logo of the biller.
- Name – Biller’s display name.
- Company Name – Registered company name of the biller.
- VAT Number – Tax identification number.
- Email – Biller’s email contact.
- Phone Number – Biller’s contact number.
- Address – Location/address of the biller.
- Action – Edit or Delete the biller record.
To create a new biller profile, click the Add Biller button 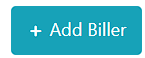 located on the top left of the
Biller List page. This will open a form to input biller details.
located on the top left of the
Biller List page. This will open a form to input biller details.
 Figure X: Add Biller Form
The form includes the following fields:
- Name – The name of the biller.
- Image – Upload an image or logo for identification.
- Company Name – Legal or business name.
- VAT Number – Optional VAT/tax ID.
- Email – Contact email for the biller.
- Phone Number – Contact number.
- Address – Full address of the biller.
- City, State, Postal Code, Country – Additional address details for location clarity.
Once the form is completed, click the Submit button to save the new biller.
Supplier
The Supplier Module is used to manage all suppliers in the system. It stores key details such as contact information, VAT, and outstanding balances. Users can also perform actions like viewing due reports or clearing payments directly from this module.
Supplier List
The index table displays all supplier profiles added to the system along with their outstanding dues.
 Figure X: Supplier List Index Page
Key Columns:
- Image – Logo or photo of the supplier (optional).
- Supplier Details – Name, company name, VAT number, email, and contact number.
- Total Due – Total outstanding amount owed to the supplier.
- Action – Edit, Supplier Due Report (view list of outstanding transactions), Clear Due (settle payments), and Delete the record.
Add Supplier
Click the Add Supplier button  located at the top-left of the Supplier List page to open the new
supplier form.
located at the top-left of the Supplier List page to open the new
supplier form.
 Figure X: Add Supplier Form
Fields in the form:
- Name – Full name of the supplier contact.
- Image – Upload logo or supplier image.
- Company Name – The registered name of the supplier’s business.
- VAT Number – Optional tax identification number.
- Email – Primary email address.
- Phone Number – Contact number for communication.
- Address – Full address of the supplier.
- City, State, Postal Code, Country – Complete location details.
- Both Customer & Supplier – Optional checkbox. When enabled, the supplier will also be added to the Customer table.
Click the Submit button to save the new supplier.
Additional Actions
1. Supplier Due Report
This shows a breakdown of outstanding balances related to the selected supplier.
 Figure X: Supplier Due Report
- Date – Date of transaction.
- Reference No – Transaction ID or invoice number.
- Supplier Details
- Grand Total – Total invoice amount.
- Returned Amount – If any return was made.
- Paid – Amount paid so far.
- Due – Remaining balance.
2. Clear Due
Used to pay off outstanding dues. Clicking this opens a popup form.
Figure X: Clear Due Popup
- Amount – Total amount to be cleared.
- Note – Add reference or remark for the transaction.